Automating My Business Processes Using Zapier: Bringing it all Together

In my last post, I discussed all the platforms we use on each project we take on. There are others that we use, and our use of them depends on the goals of the project, but at a minimum, every project we work on is managed through those five systems. Below is an outline of the process to take a project from Scope of Work to Active Project in each of those systems.
Our Project Intake Process
- The scope of work is signed and complete with all billing information
- Project intake form is completed by a salesperson
- Zapier Automation
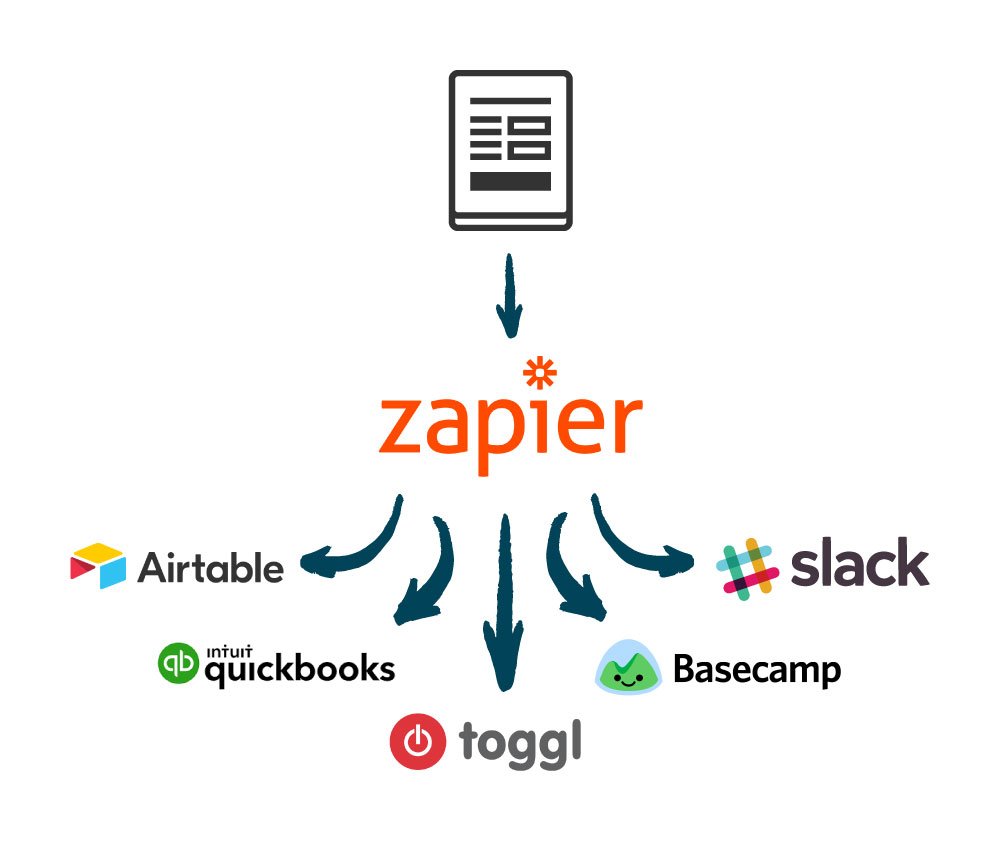
- Client (if new) is created in Airtable, Quickbooks and Toggl
- The project is created in Airtable, Basecamp, and Toggl
- A project channel is created in Slack
- A message is sent to #new_projects channel in slack; Project Manager is tagged in message
- A message is also sent to the project channel that contains project details
- Account and billing details are added to Quickbooks
- Billing details are added to billing dashboard in Airtable
- Email is sent to Accounts Receivable (A/R)
- A/R sends first invoice
- A/R sets up future billing according to contract
- Project Manager Housekeeping
- PM coordinates kickoff date with client
- PM creates a client-accessible folder in Basecamp for client to upload assets
- PM requests accesses to platforms, website, etc.
- PM sends invites to appropriate internal and external contacts
- PM assigns task of creating kickoff document to project lead, to be due not less than 24 hours before the kickoff meeting
- Project lead collects relevant information for kickoff document from other internal team members and creates kickoff document according to brand standards
- Project lead uploads kickoff document to Basecamp and notifies PM
- PM sends kickoff document to client
- PM, PL, and select other team members attend kickoff meeting
- Immediately following meeting with client, internal post-kickoff meeting begins
- Immediately following post-kickoff meeting, PM sends thank you and summary of needs to client
- PM creates due dates of all immediate next tasks as applicable in Basecamp
- Project is officially kicked off, and fulfillment begins
Clearly, a lot of work goes into the first steps of getting a project kicked off internally, and there is still work to do in automating even more of it, but what I’m going to describe next is the portion under step 3, “Zapier Automation.”
1. Client is created in Airtable, Quickbooks and Toggl
Once our salesperson submits the Project Intake Form, the first thing we do is use Zapier to check if that client exists already in our client list. If they don’t, we add a new client to each of our systems using the information submitted in the form.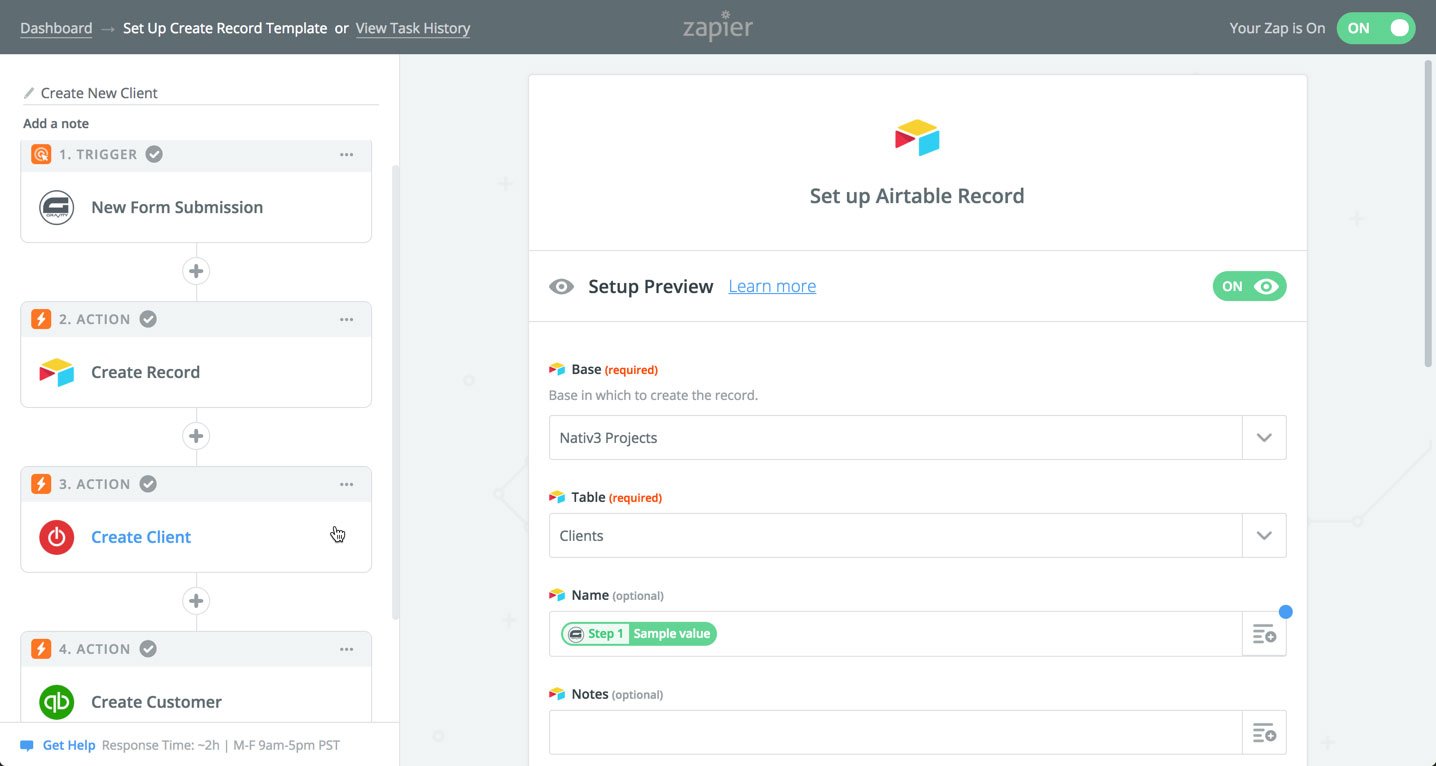
Zapier allows us to dig into the form data submitted at our website, and import that data into the various systems in which we need to add a new client. It really is as simple as defining that the “Client Name” field in my form is the same as the “Name” field in my table called “Clients” at Airtable.
2. Project is created in Airtable, Basecamp, and Toggl
Next, we’ll need a project created in each of these tools so that we have a space to work on the individual project for this client. This is helpful because we sometimes have more than one project going for a client, or we may close one project for them and start a new one. In either case, we are able to track those projects separately from one another. Once again, Zapier allows us to take the information that was submitted in our form and add it to the appropriate places in the other tools.
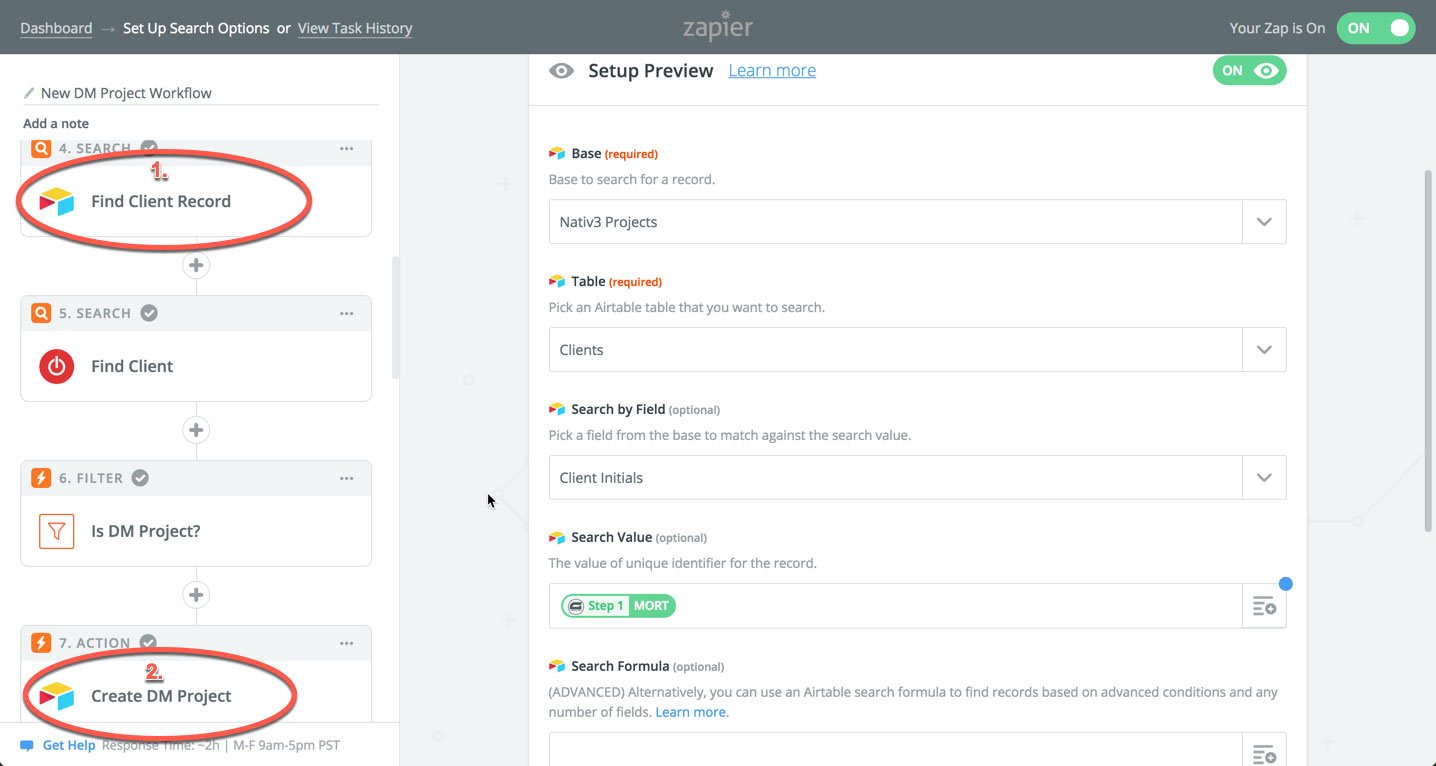
In the screenshot above, we first find the client record that was created in the previous step, and then we create the project, inputting all of the relevant project details.
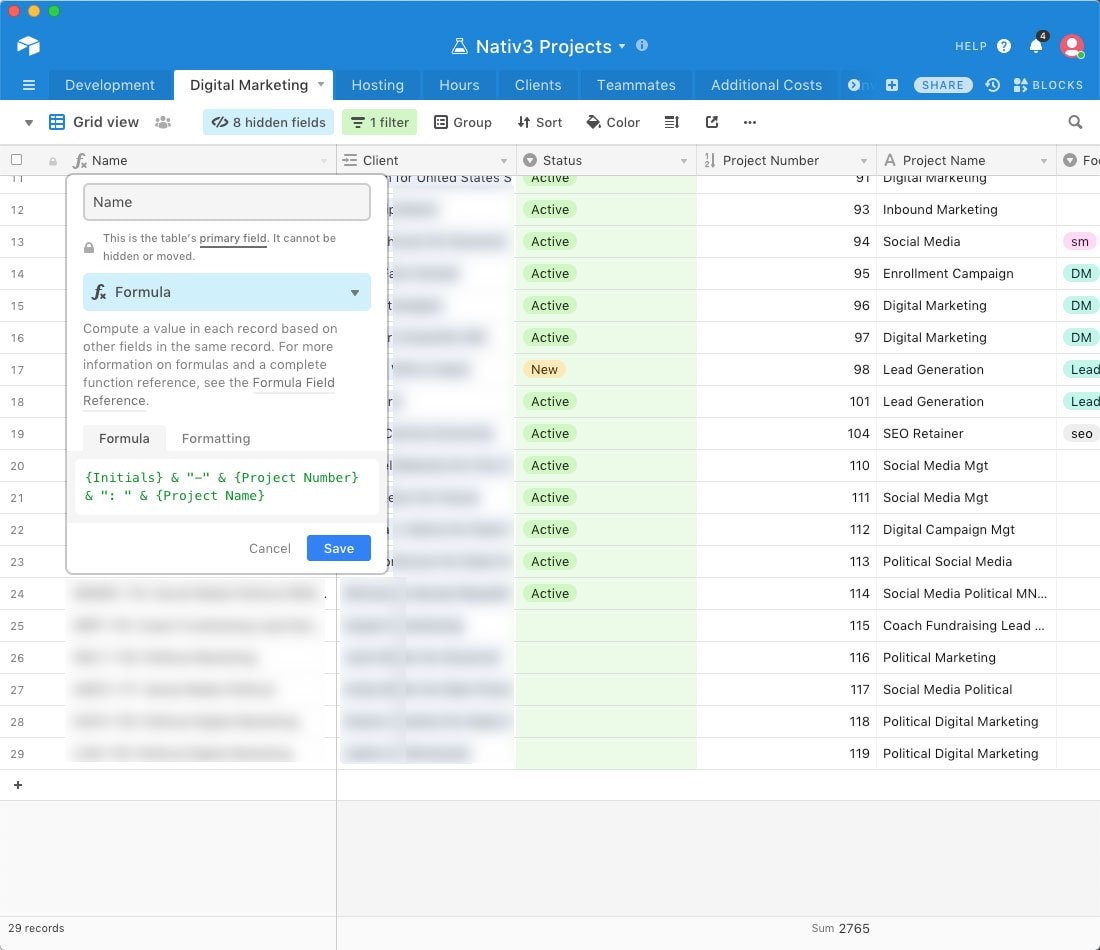
Airtable provides a Swiss Army Knife set of functionality which allows us to craft a project number that will be unique to the project and provides a way for us to track the project throughout all of our systems. It works like this:
When we first create a client in Airtable, we also define a unique code based on the client’s name, aptly called “Client Initials.”

Using that piece of information, we use the formula functionality in Airtable to combine the Client Initials with an auto-incrementing number to create our unique project number. Lastly, we tack on the Project Name, which is usually the focus or goal of the project. Our full project code ends up being something like this — CGECR-111: Lead Generation.
A quick aside — One of the many cool things about Zapier is that you can actually do some preprocessing of data before you use it in other tools.
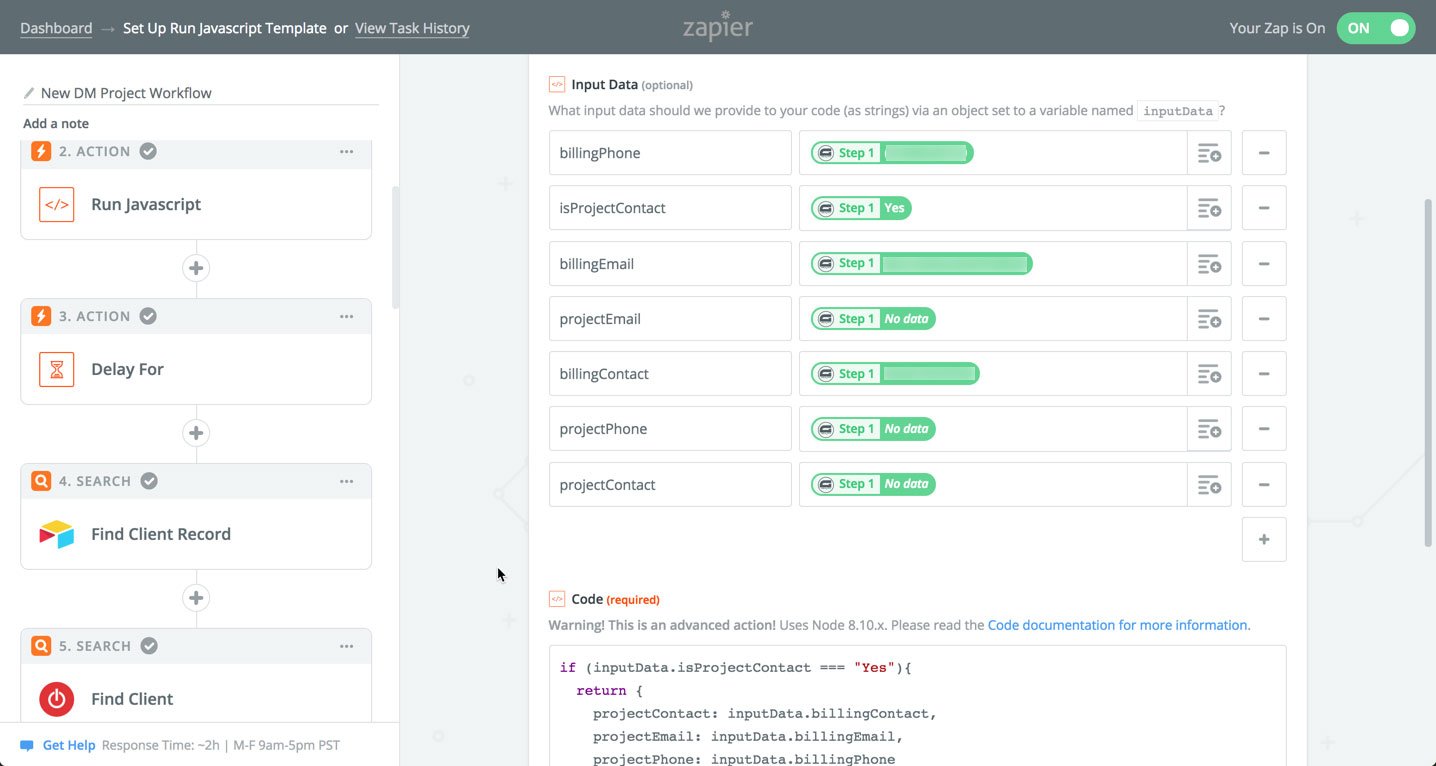
For example, in the screenshot above, I am running a check on the form submission to determine if the billing and project contacts are going to be the same person. We have a question in the form that asks this. If they are the same person, we are redefining variable ‘projectContact’ and its associates, ‘projectEmail’ and ‘projectPhone’ to be used a little later in the various notifications.
3. Project channel is created in Slack
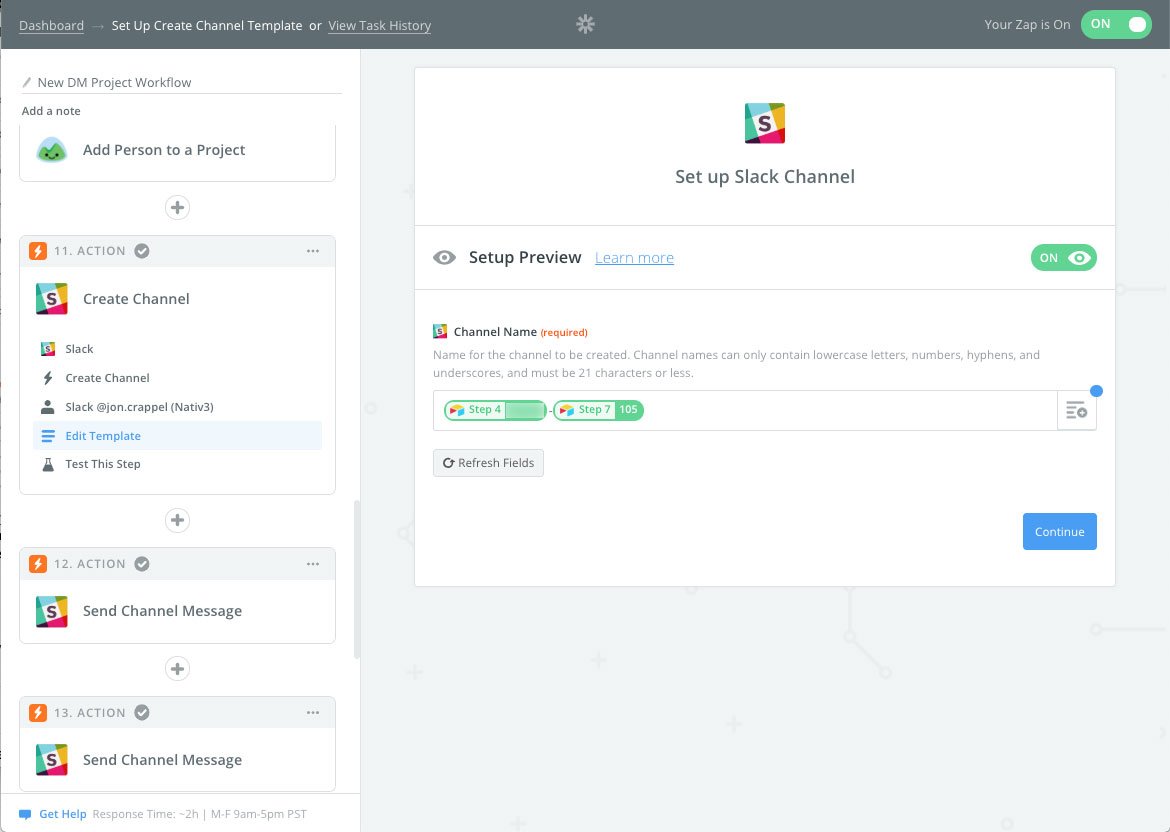
Part of this same task in Zapier is to create a channel in Slack in which we contain all of our conversations related to this project. We create the project channel using the project number created earlier in Airtable.
4. Message is sent to #new_projects channel in slack, Project Manager is tagged in message
In order to get the notification out to the team that we have a new project, we set up the next piece of our Zap to send a brief notification that will be dropped in our #new_projects channel in Slack. The reason this is necessary is because when creating a new channel in Slack, you can’t tag someone in a message unless they’ve already been added to that channel.
We’ve created the project channel, but none of our team has been added to it, so we drop a message here notifying the project manager of the new project so that she can go and add the necessary people to that channel.
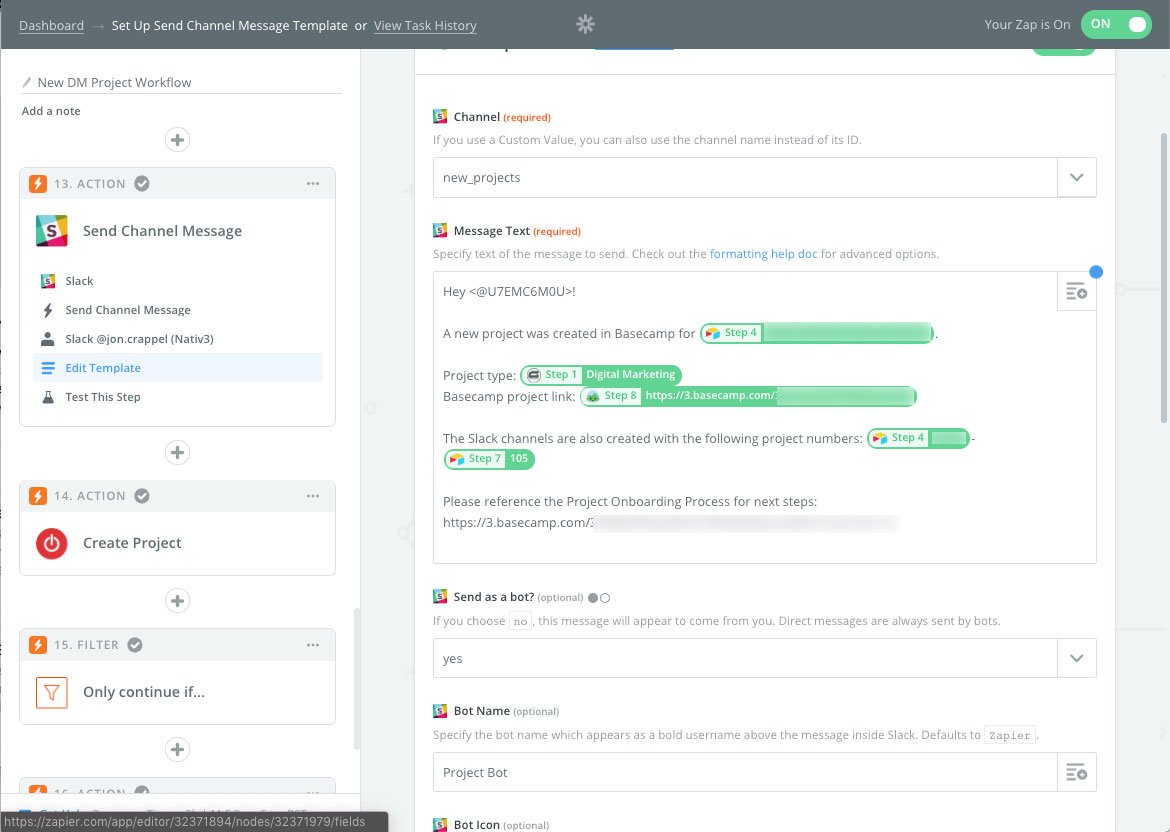
In this notification, we let our PM know where to find the project in Basecamp and Slack, as well as the project number. She now has everything she needs to start putting our team to work.
Wrapping Up, Moving to Fulfillment
Next week, I’ll detail the final pieces of our Zaps that adds a notification to the project channel in Slack, creates the billing information in Quickbooks, sets up the project in our billing dashboard, and, finally, notifies A/R that we have a new project so that she can set up the billing schedule.